Schedule a Meeting
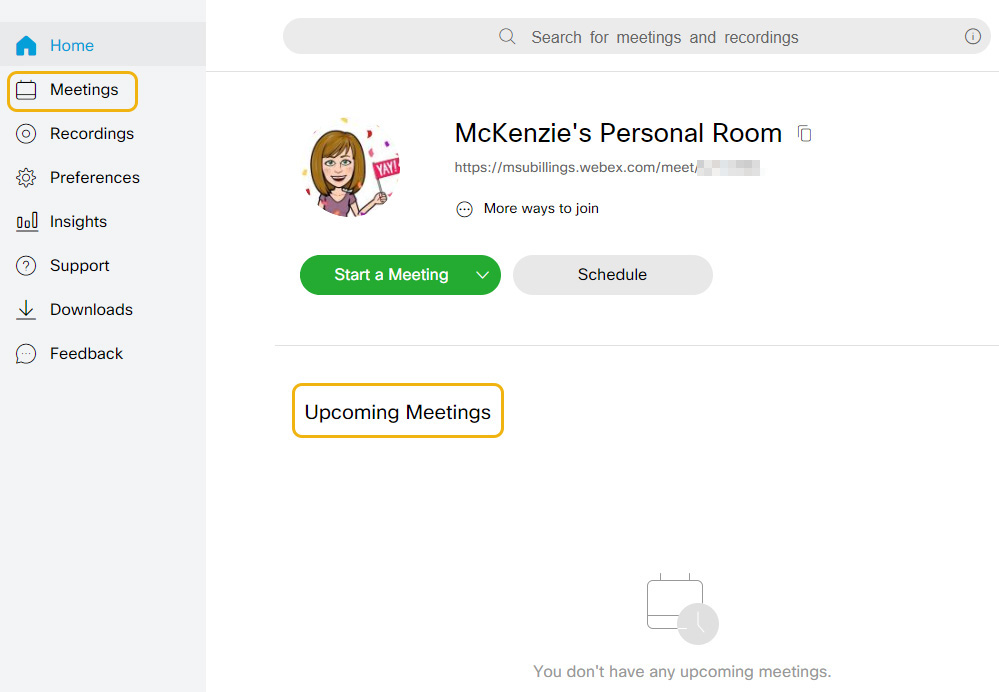
In almost every situation, you will want to schedule your meeting instead of clicking
on the Start a Meeting button. The Start a Meeting button takes you to what is referred
to as your “personal room”, which serves as a quick, temporary meeting space. Using
the schedule function can save you and your attendees a lot of confusion down the
road!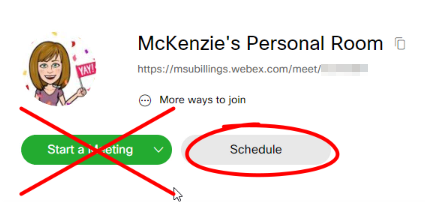
- Start by logging into Webex at msubillings.webex.com. Scheduling will need to be done from a desktop or laptop computer, as this function
is not available on mobile devices yet.
- Click on Schedule.

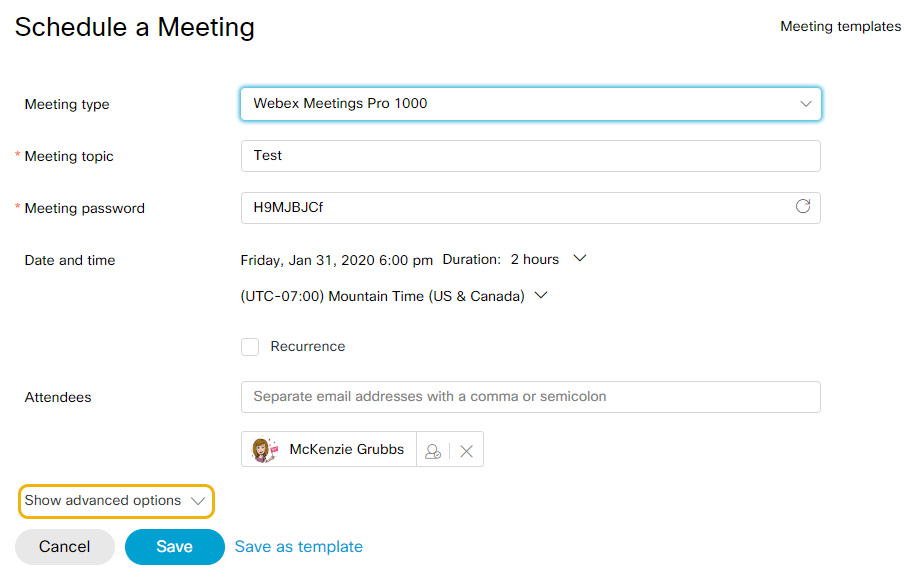
- Edit your meeting topic, date, and time.
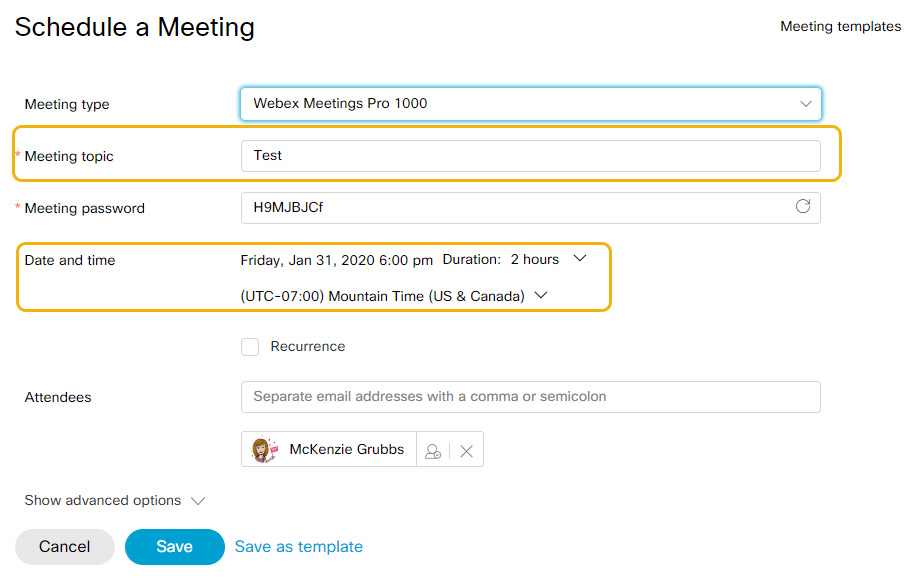
- You do not need to change the meeting password, as users will join your meeting via
link.
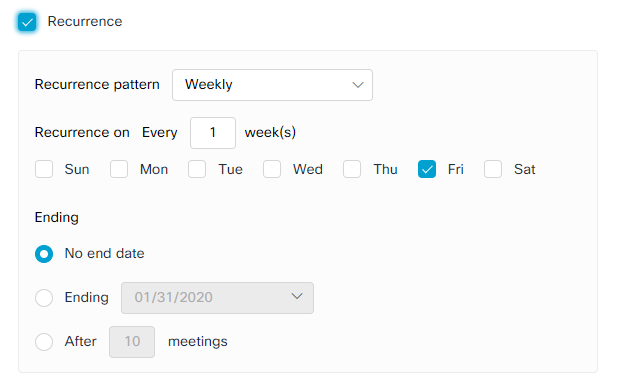
- If you are scheduling a series of meetings, you can use the recurrence feature.
- You can invite participants by email if you choose, or by sending them the link to
the scheduled meeting. We personally recommend posting the meeting link on D2L under announcements or content (or preferably both) when applicable.
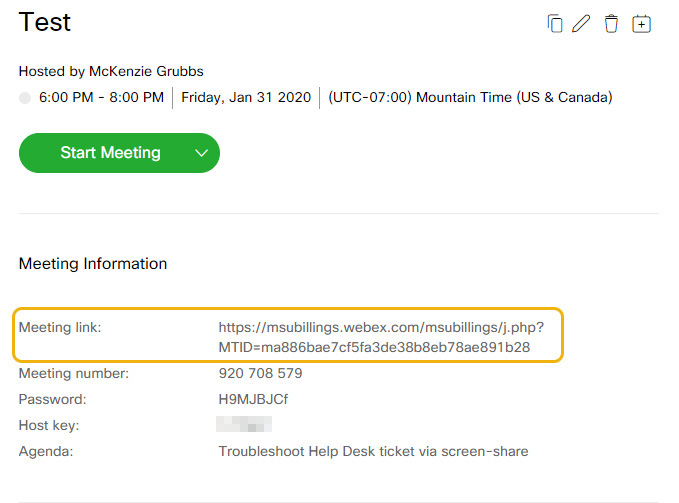
- It is recommended that you invite yourself to the meeting so you have the invitation
to forward to others.

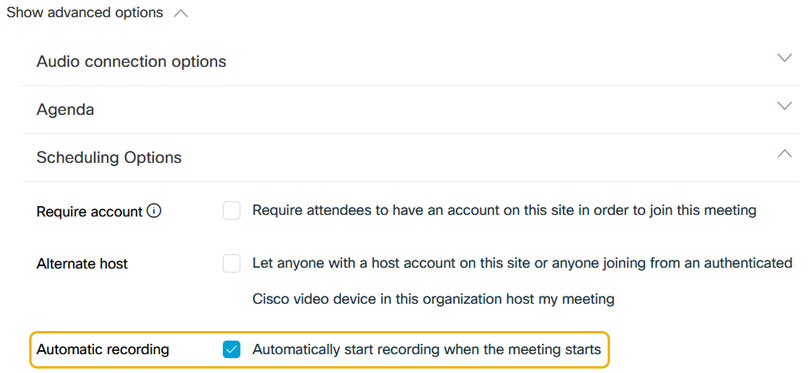
- For other advanced options, like automatic recording, click on Show advanced options at the bottom.
- Once you have everything set, click on Start or Schedule (you may see either option, depending on when your meeting is scheduled). You can
also Save as template to save your preferences for future meetings.


- You will be directed to the meeting page, where you can start the meeting, share the
link, and add additional attendees.
- From the home page, you can navigate back to the meeting page by checking your Upcoming Meetings notifications or clicking on the Meetings option on the right.
