Scheduling a Webex Meeting
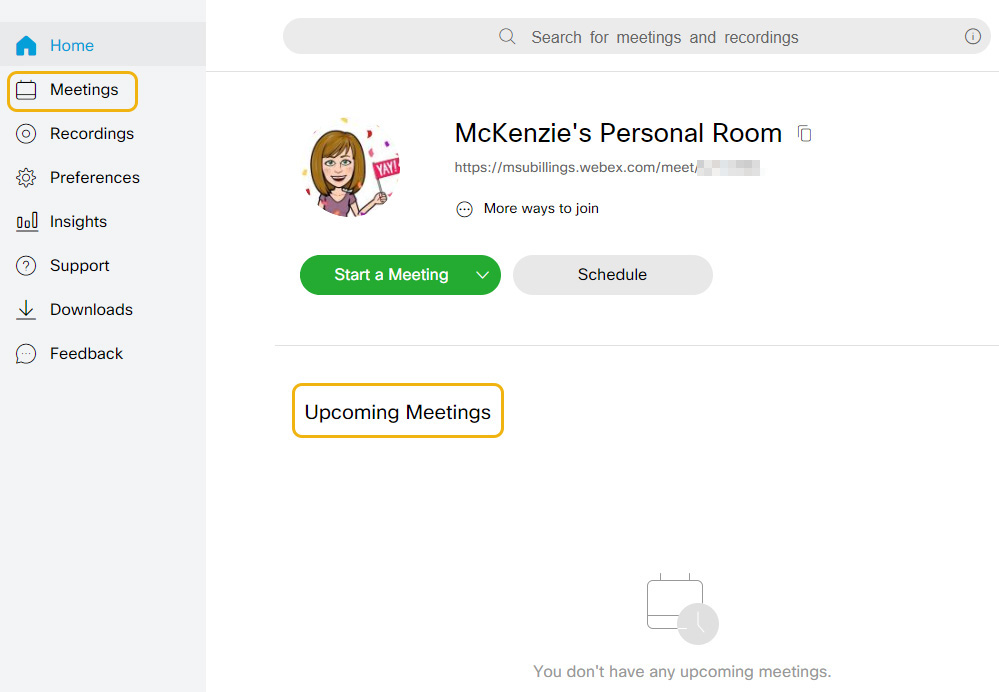
In most situations, you will want to schedule your Webex meeting in advance instead of starting an ad hoc meeting by pushing the Start Meeting button. The Start a Meeting button takes you to what is referred to as your “personal room”, which serves as a quick, temporary meeting space. Using the schedule function always you to schedule a Webex meeting and generates a unique meeting room for that meeting.
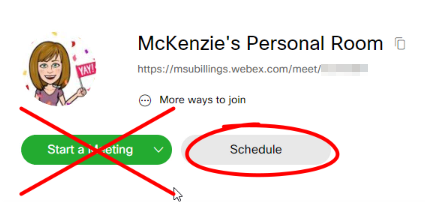
To schedule a Webex meeting:
1) Log into Webex at your respective site.
2) Click the Schedule button.

3) Enter your meeting topic, date and time, and invite your attendees. You can invite attendees via email by adding their email address into the Attendees text box and clicking Enter to add them to the list. You can also send attendees the link to the scheduled meeting.
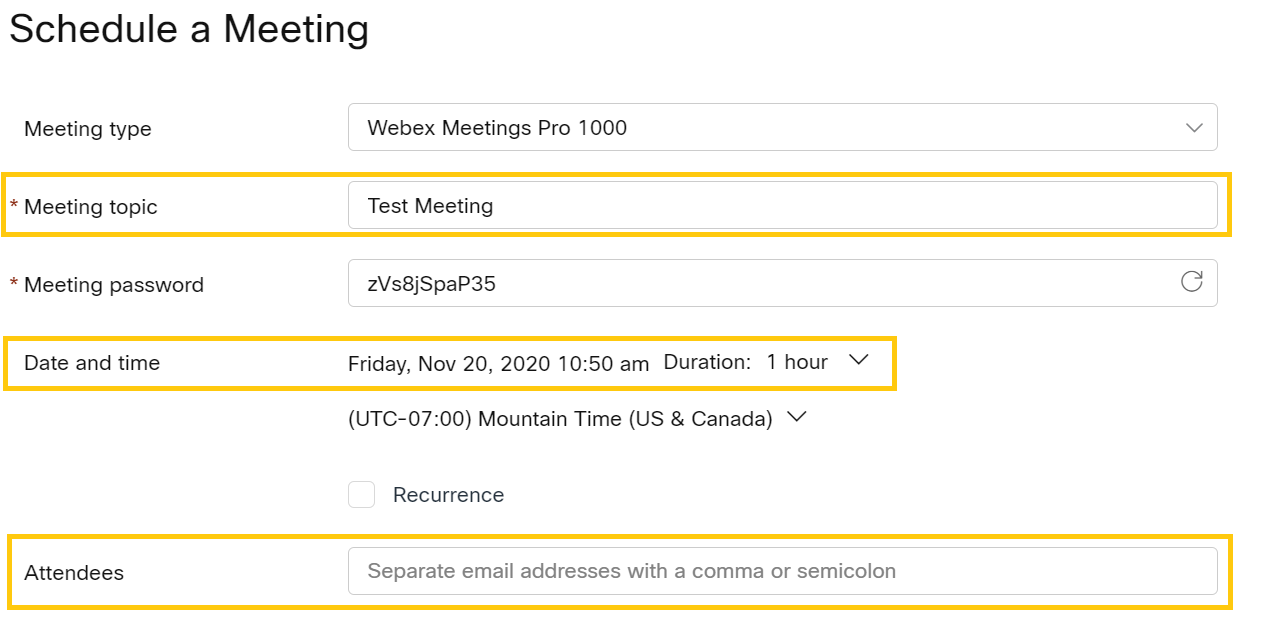
Important: You do not need to change the meeting password, as users will join your meeting via
link or email.
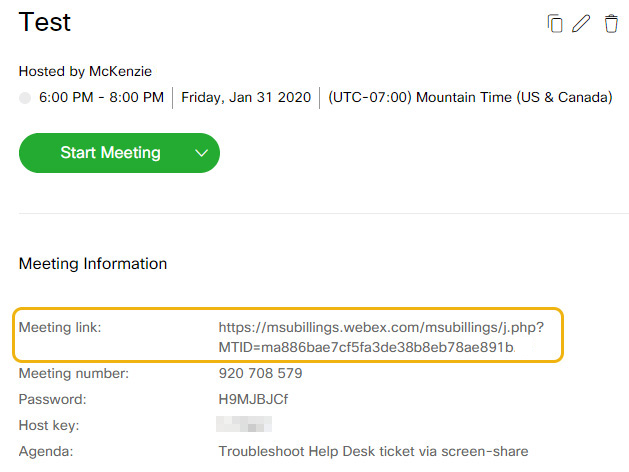
Note: For faculty, we recommend posting the meeting link in D2L under announcements or content (or preferably both) when applicable. The link can be found in the Meeting Information section after scheduling your meeting.
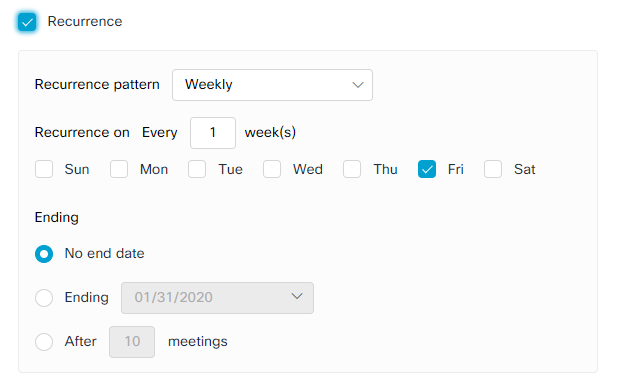
4) If you are scheduling a series of meetings, you can check the recurrence checkbox and configure the recurrence settings.
5) For other advanced options, like automatic recording, click on Show advanced options at the bottom of the settings.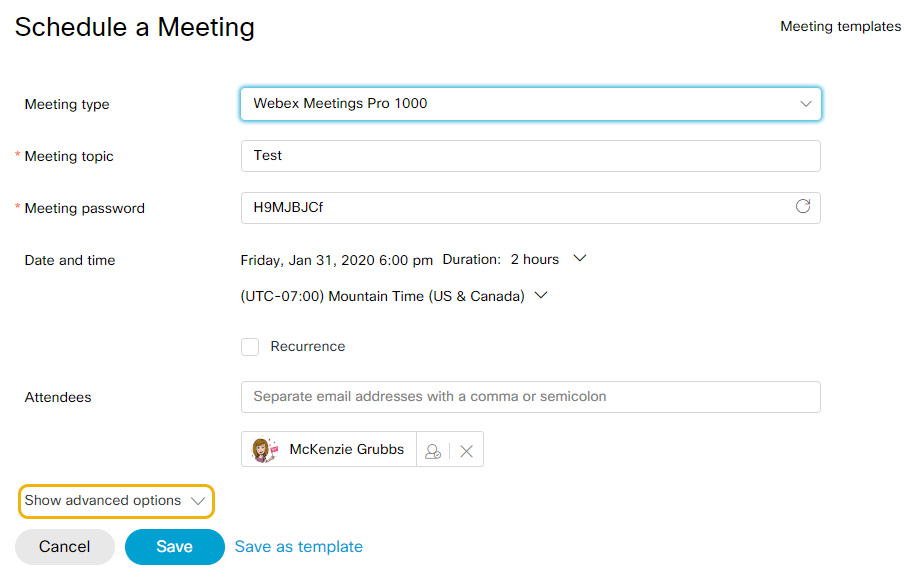
6) Once you have everything set, click on Start or Schedule (you may see either option, depending on when your meeting is scheduled). Clicking Start will immediately start the meeting while clicking Schedule will schedule the meeting for the time you set. You can also Save as template to save your preferences for future meetings.

7) If you clicked Schedule, you will be directed to the meeting page, where you can start the meeting, share the link, and add additional attendees.
From the home page, you can navigate back to the meeting page by checking your Upcoming Meetings notifications or clicking on the Meetings option on the right.
